Wednesday, November 23, 2011

Support Handmade Spotlight: Release Me Creations


Today we have Maureen for Release Me Create, read on for the FREE SHIPPING code at the bottom of the post:)  She's also got a beautiful holiday decor project to share with you. One thing I really love about it is, that once you make it you can leave it up all winter long!  It's always so sad to me, when all the decorations go away after New Years, because my house always looks kinda bare then.  This is such a fun way to incorporate natural elements into your home for the entire season. 
 
Hello everyone! I'm so very excited to be a guest blogger today on Katie's Nesting Spot! My name is Maureen, and I blog over at: Release Me Create 
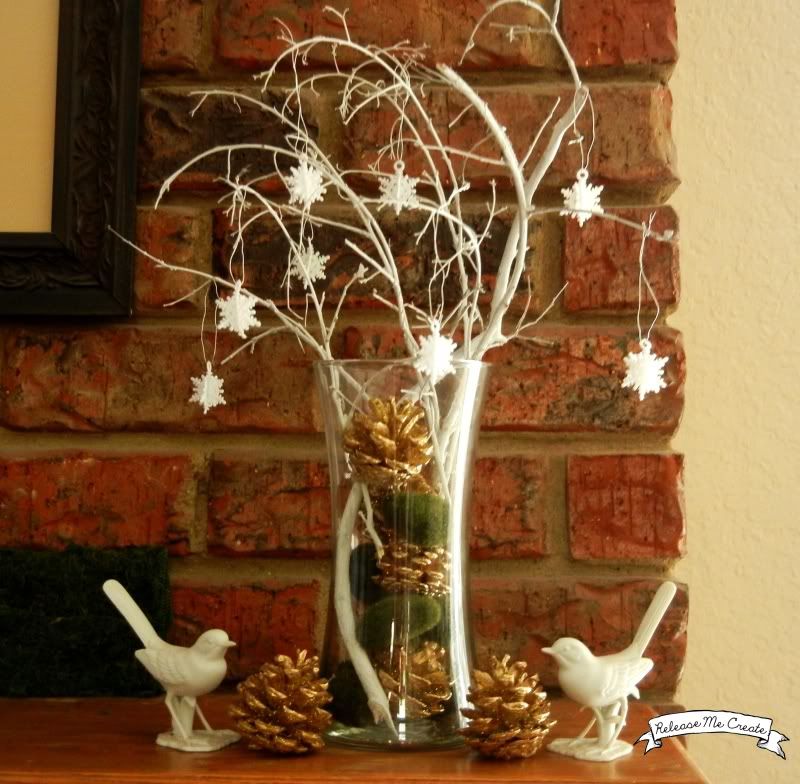
Today I bring you this fun, easy, and ultra cheap diy holiday decor project:
WHAT I USED:
-Some small branches
-Pinecones
-Gold spray paint
-White spray paint
-Moss covered styrofoam "stones"
-Tiny white snowflake ornaments
-Glass vase
1) Find some branches just lying about and remove any foliage or extra stems you don't want


2) Spray paint them white (or gold or silver, or whatever color you like)


3) Find some pinecones, spray paint them gold, slap on some glue and pour on the glitter! (No photo of this as I was impatient and didn't want to wait for my camera battery to charge)


4) Travel to the craft store to find some cute things to fill within the vase, and some ornaments to hang on your branches -I found the tiny snowflakes, 
the moss stones, and the vase all for $9 with my coupon 
and their 50% off holiday decor sale at Hobby Lobby! 5) Fill up the vase, add your twigs, hang your ornaments and viola...a cute little holiday arrangement!
I added my little white ceramic birds for a final finishing touch. 


Thank you so very much for letting me join you today!
 
You can come visit me anytime on my BLOG, FACEBOOK, or TWITTER!
 
And if you're holiday shopping, I am offering FREE SHIPPING in my ETSY SHOP
 
Just enter Coupon Code: MERRYHOLIDAY11

Signature

Tuesday, November 22, 2011

Quick Teacher Gift: Gratitude Candle Wrap

This week is Thanksgiving break here in the States.  We wanted to give ER's kindergarten a little gift to show how thankful we are to have her as a teacher.   As always, I'm running short on time.  Some little glass candles in my gift closet and where's what I came up with.  It only took a few minutes to whip up these up with Louise Frank Design's kit I Smell Autumn Coming
Here is a close up of the quote cluster I made, the E is for the teacher's last name.  Cute, quick, and zero dollars as I used supplies I already had on hand.  My kind of gift :)  Now that I've created it, I can use it over and over just by making some adjustments to resize it for whatever kind of candle I'm using.  Fabulous!

Signature

Disclaimer: As part of the Louise Franks Designs DT I receive access to kits to create promotional items and one of these kits was used for my project.

Monday, November 21, 2011

Thanksgiving Place Cards into Mini Book

Thanksgiving place cards are such a nice touch to your table setting but they often end up being disposed of after the turkey is eaten.  I always want to make them, but if I'm going to put the time and effort into creating them, I want them to have some kind of life afterward.
To save time and money I turned to one of my favorite new kits, I Smell Autumn Coming by Louise Franks Designs.  In addition to the kit, Louise came up with some fabulous word art, also available in their own little mini kit. There's also a cute set of kraft colored alphas.  I used all three to create my place cards and the word art kit really helped speed designing along as well as the goodies like the premade frame, tied ribbon, and journaling spots from the kit.. 

You can see the different versions and all the components of the I Smell Autum Coming bundle on the Louise Franks Designs Digiscrapping blog.
Each place card has a spot for a current picture of the dinner guest, their name, the year, and a spot to write why they've been blessed the past year.  You just personalize it for each one before printing.  I made two versions with slight variations, the background paper and the word art on the front and by the journaling spot has been switched up.
Glue the place cards together, punch a hole, put the filled out cards onto a metal O ring, and you've got yourself a little 3X3 inch mini.  So easy and it's all done right after the meal, now you can relax and peruse the sales circulars to plan out your shopping for Black Friday!

Signature

Disclaimer: As a member of the Louise Franks Design Team I receive access to kits to create promotional items, these kits included.  Please note that several purchase options are available, product links will take you to the personal use versions.  Melamine plates used in photos are from Potterybarn Kids.   
Blog Widget by LinkWithin

  © Blog Design by Simply Fabulous Blogger Templates

Back to TOP